Courses
Naming
Naming improves readability and structure
When using Naming and the Naming Manager properly, you get workbooks that are more dynamic, with fewer errors, improved readability and traceability.
Objects possible to name
The following objects can be named in Excel:
- Pivot Tables: Pivot Tables are usually data sources for Charts, important to keep track of in a large Dashboard.
- Tables: Tables are valuable to keep track of as they are often used as data sources and therefor being referred to.
- Ranges: Ranges are also possible to name, but this should be avoided as it is a static way to handle data sets.
- Cells: Useful for constants or variables.
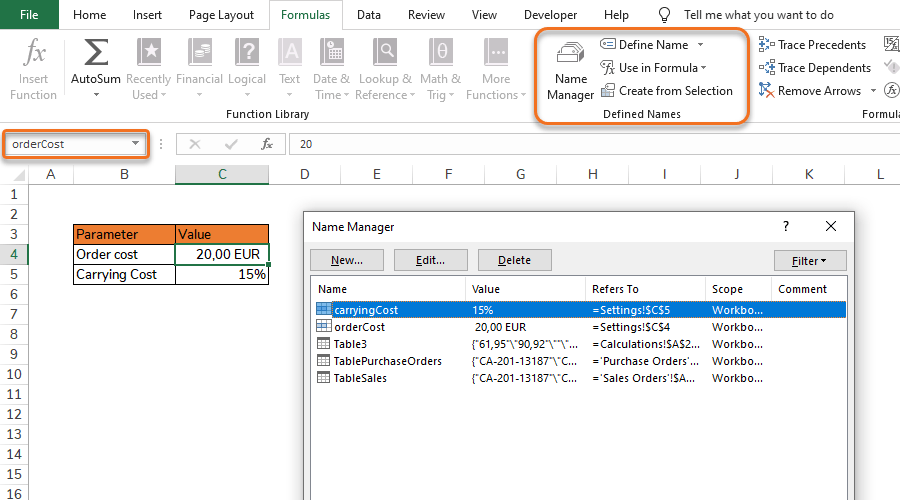
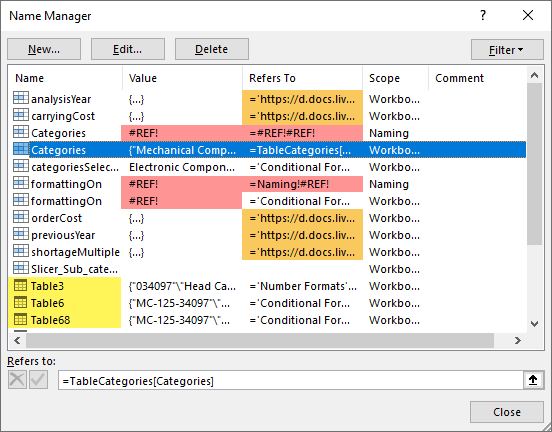
Name Manager
The Name Manager is a great tool to trace and manage: errors, potential problems, badly named objects
Tip: Use Name Manager
Names can be added, edited and deleted directly in the Name Manager.
Standard naming convention
Create a standard naming convention to get a clear distinction between different types of objects. This is of great help when reviewing data in the Name Manager and when writing or interpreting formulas.
Warning: Avoid Named Ranges
Avoid using static named Ranges, instead use Tables where column data is retrieved with Structured References.
| Objects | Naming convention | Examples |
|---|---|---|
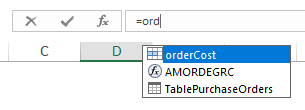
| Tables, Pivot Tables | Name with initial capital letter and with object type. | TableSales, TablePurchaseOrders, PivotTableSales |
| Cells | Name with initial lowercase letter and without object type. | categoriesSelection, currency |
Naming of cells
Naming of cells is preferably used for constants and variables placed in a workbooks Settings Sheet.
Warning: Avoid Named Cells with Tables
A named cell is statically connected to its specific cell location (e.g. A2). It is not recommended to use named cells together with Tables (or ranges with filters), as a Table sort will move the cell value, but not the name.
Naming of Tables and Pivot Tables
Both Tables and Pivot Tables are named automatically upon creation as Table1, Table2,… etc. These are not very good names, and Tables and Pivot Tables should therefor be renamed. Make it a habit to rename your Tables after creation. Named Tables will save time for yourself and others. It will make formulas and Pivot Tables make more sense when referring to Tables. Also, it gives you a better understanding and overview of all data in the workbook when looking in the Name Manager.
Quick guides
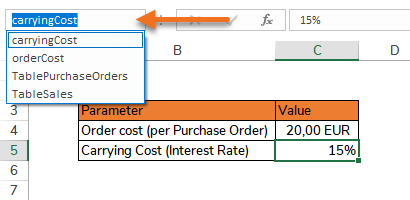
Option 1 – Use the Name Box:
Step 1 – Select the cell to be named.
Step 2 – Replace the A1 reference style name (e.g. B3) in the Name Box with a custom name.
Step 3 – Press Enter ↵
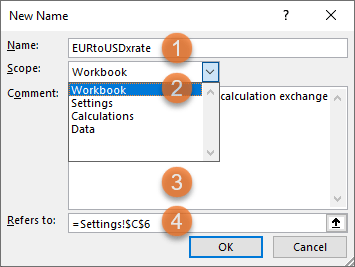
Option 2 – Use the Name Manager:
Step 1 – Select the cell to be named.
Step 2 – Go to Formulas > Name Manager
Field 1 – Set a name.
Field 2 – Select the scope of the name.
Field 3 – Write a short description of the constant or variable for smoother handovers.
Field 4 – Set a reference to the name area.
Option 1 – Use the menu:
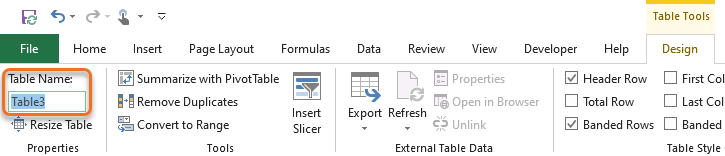
Step 1 – Select the Table or Pivot Table to be named.
Step 2 – Go to Table Tools > Design
Step 3 – Change Table Name
Step 4 – Press Enter ↵
Option 2 – Use the Name Manager.